Leonie's Homemade Incubator
My decision to make a homemade incubator came about when I had a terrible experience with an ebay.com.au brought incubator.
The story goes: I borrowed a friend’s incubator and sourced some fertile eggs. I was so excited about my first hatch and waiting for the 21 days to be up was excruciating.
However day 21 came and went with we did not have a single hatch (we had one piped egg, but the chick died). I was devastated yet again and after some investigation with the incubator I discovered that although the information that was being displayed on the outside of the incubator was correct...What was actually happening inside the incubator was wrong.
I came to the conclusion that this incubator was not a very good incubator at all and after feeling like the worst person in the world (for killing these little chicks) I vowed NEVER to try and incubate chicks again.
Needless to say my husband had encouraged me to try again. After searching for a decent incubator to buy I found that they were all REALLY expensive (which I decided wasn't worth it due to the small number of eggs I wanted to hatch) and decided to do a little research into making my own...(and by little I actually mean A LOT)
I found that a lot of the instructions for making a homemade incubator meant some rewiring of lights and fans and other bits and pieces which I wasn't terribly comfortable with. Although I was confident I could rewire everything I didn't think it was particularly safe and I didn't want to spend money on getting an electrician to do it and so I set out to develop an incubator which could be made where NO REWIRING was required.
Well I made my own incubator and I set another 12 eggs (8 of which were actually fertile) and on 10 May 2012, we hatched 6 beautiful little silkies. (You can see pictures of them on the silkies page)
Now I know this isn't the "prettiest" of incubator but I know it works!
This Is How I Did It
Things You'll Need - Don't Stress if you don't know what I am referring to. There will be pictures below.
1 x Polystyrene Box with Lid
1 x Sheet of Glass, Perspex, Plastic anything you can see through and use as a viewing window
2 x Lamp Kits (These can be hard to come by. I brought my lamps from Ikea because, like everything from ikea, they required being put together and so
it was quite easy just to remove the plastic mount that was on the lamp...There are pictures below of the exact lamp I used before and
after)
2 x Light Globes (I used 18 watt globes from Ikea but depending on the size you make you incubator you may need stronger or weaker globes. This takes
some trial and error to work out. Please note energy saving globes should not be used)
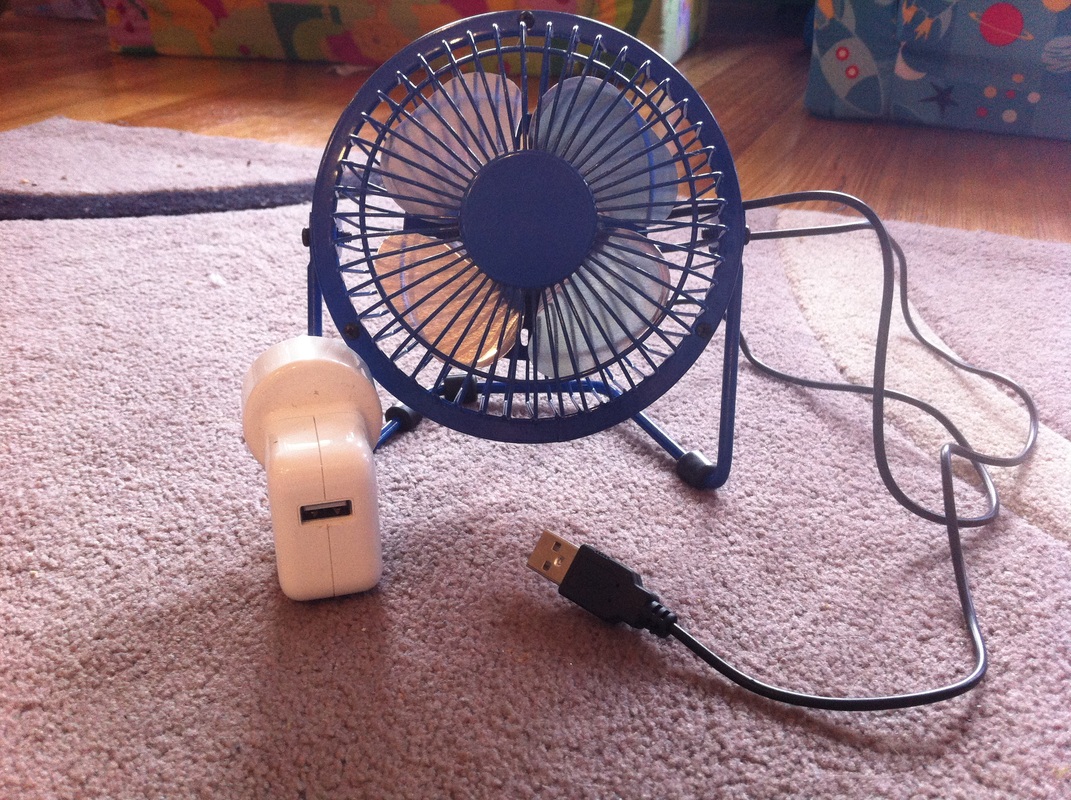
1 x USB Desk Fan (I purchased mine from ebay for about $9)
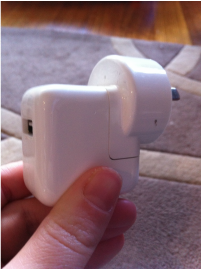
1 x USB 240 volt wall charger (If you have an iPhone you can use the wall charger that came with that or you can pick them up quite cheap from places l
like Dick Smith or even in the electical department of Big W or even ebay)
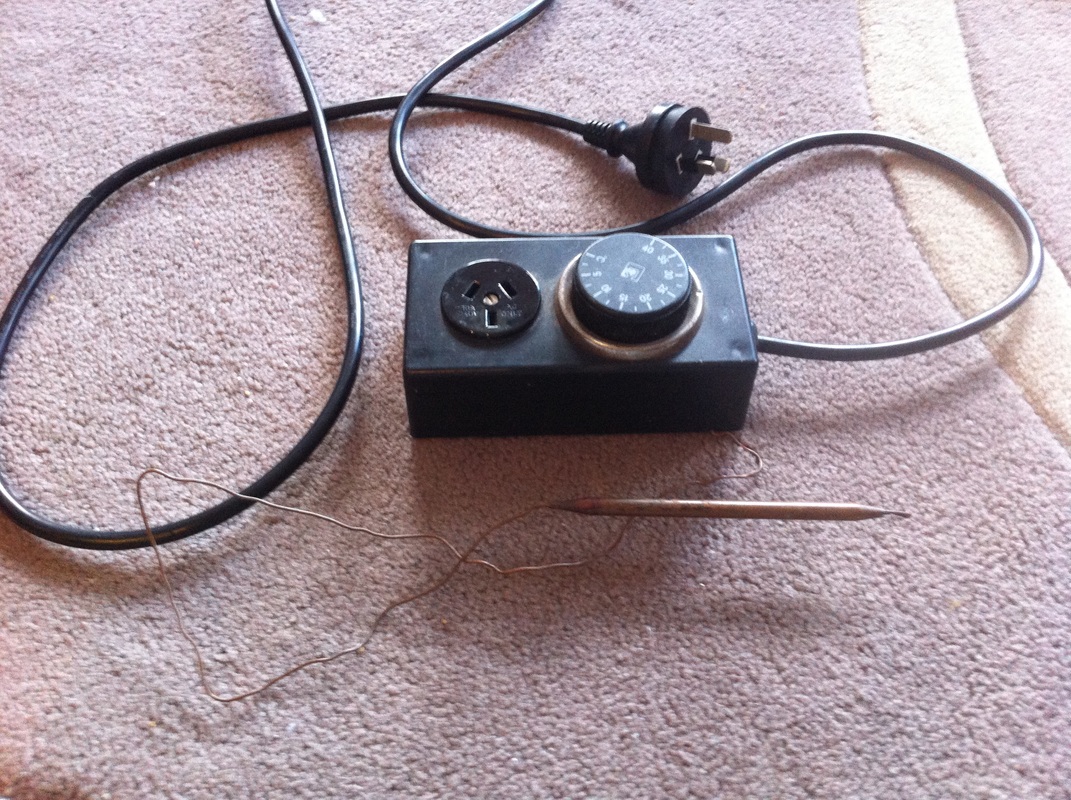
1 x Reptile Thermostat (Now these can be expensive however if you have a look around places like the trading post or ebay you can pick them up quite
cheap...Mine was about $15)
2 x Thermometers (Use 2 different types of thermometers. I brought a digital thermometer off of ebay which has a built in hygrometer and I used an old
fashioned mercury thermometer for the other. Note: one of your thermometers MUST HAVE a hygrometer).
2 x Jars filled with water
Tin Foil
Chicken Wire
Duct Tape or any other STRONG tape preferably silver
OPTIONAL
1 x 24cm x 33cm Painters Canvas
1 x 44cm (at least) length of dowel.
2 x egg cartons (for 24 eggs)
1 x Sheet of Glass, Perspex, Plastic anything you can see through and use as a viewing window
2 x Lamp Kits (These can be hard to come by. I brought my lamps from Ikea because, like everything from ikea, they required being put together and so
it was quite easy just to remove the plastic mount that was on the lamp...There are pictures below of the exact lamp I used before and
after)
2 x Light Globes (I used 18 watt globes from Ikea but depending on the size you make you incubator you may need stronger or weaker globes. This takes
some trial and error to work out. Please note energy saving globes should not be used)
1 x USB Desk Fan (I purchased mine from ebay for about $9)
1 x USB 240 volt wall charger (If you have an iPhone you can use the wall charger that came with that or you can pick them up quite cheap from places l
like Dick Smith or even in the electical department of Big W or even ebay)
1 x Reptile Thermostat (Now these can be expensive however if you have a look around places like the trading post or ebay you can pick them up quite
cheap...Mine was about $15)
2 x Thermometers (Use 2 different types of thermometers. I brought a digital thermometer off of ebay which has a built in hygrometer and I used an old
fashioned mercury thermometer for the other. Note: one of your thermometers MUST HAVE a hygrometer).
2 x Jars filled with water
Tin Foil
Chicken Wire
Duct Tape or any other STRONG tape preferably silver
OPTIONAL
1 x 24cm x 33cm Painters Canvas
1 x 44cm (at least) length of dowel.
2 x egg cartons (for 24 eggs)
Step #1
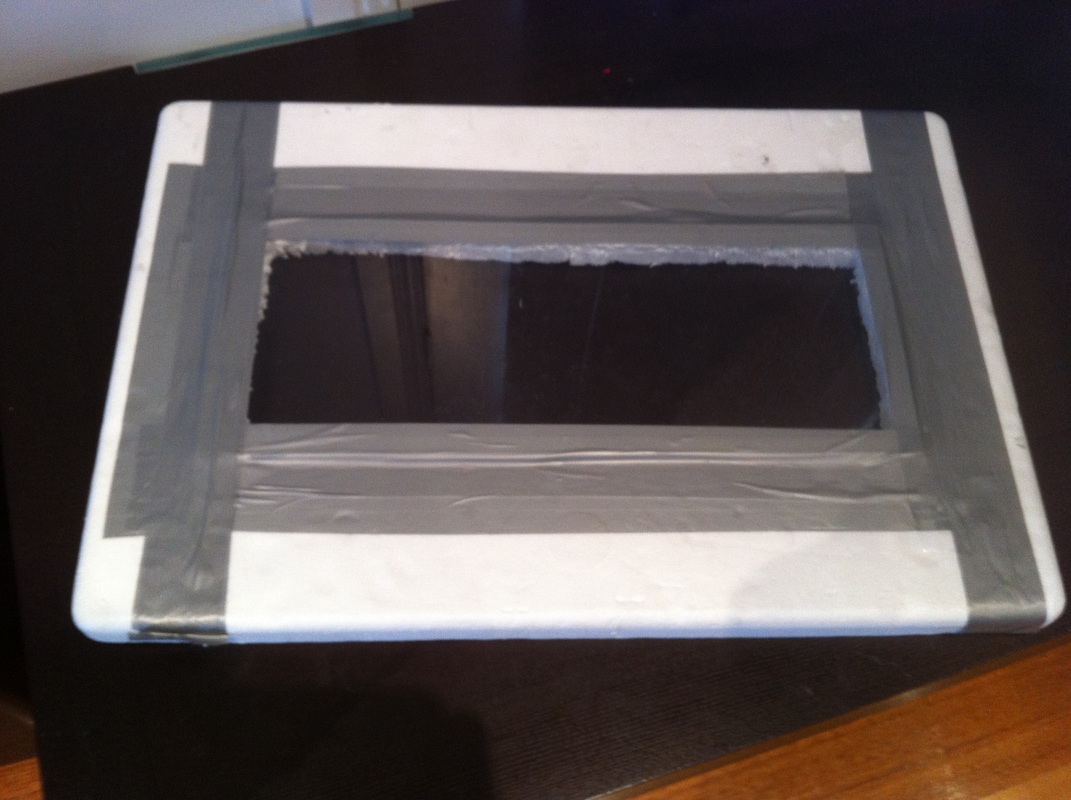
You want to cut out a section of your polystyrene lid and replace with your window.
In my case I used a piece of glass from off the top of a fish tank (The fish tank itself I am using as a brooder. You can see pictures of that on the brooder link).
I just taped mine down with heavy duty duct tape. Now you can double insulate this by placing a second pieces of glass on the inside of the lid, but honestly I found no need for it.
Step #2
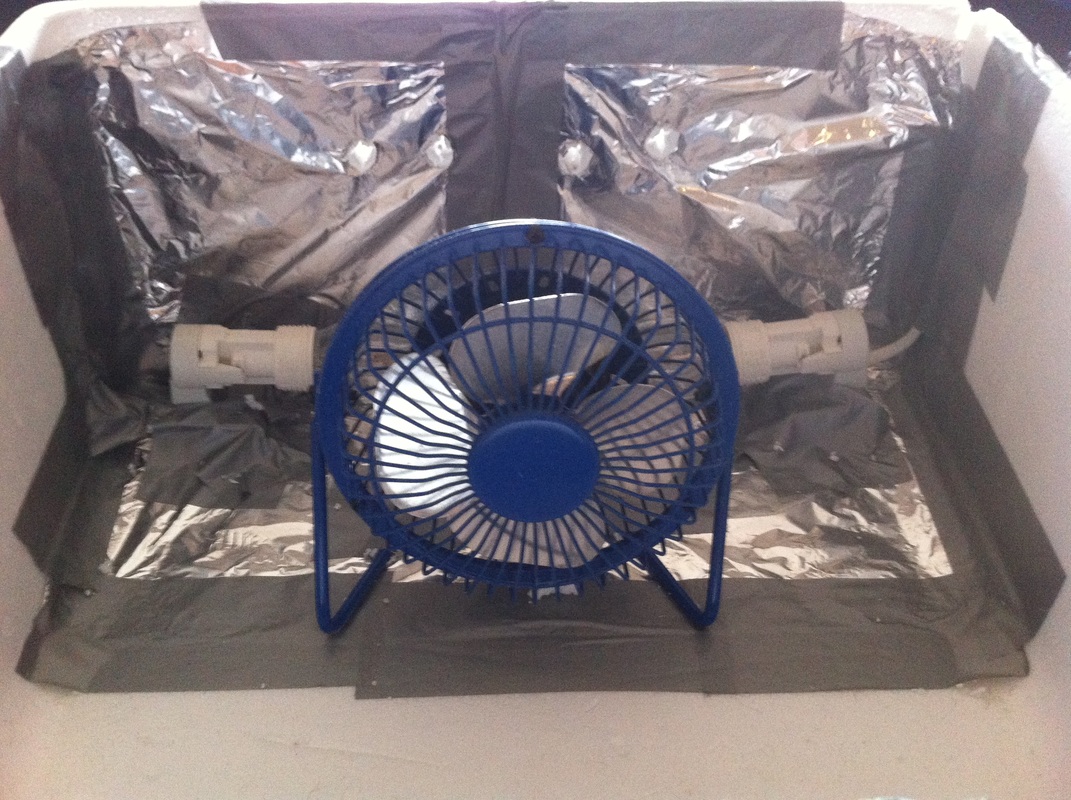
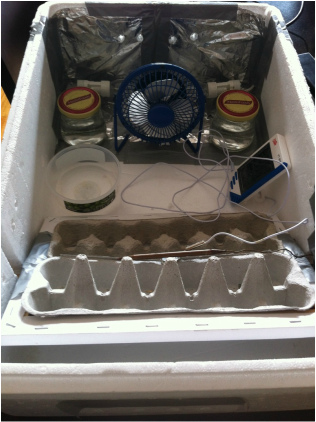
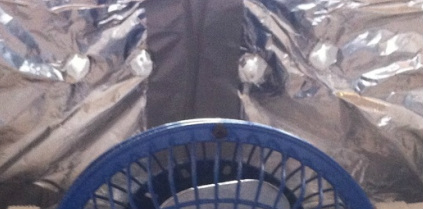
At the end of the polystyrene box (where you'll be putting you lamps and fan) cover about a third of box with foil by taping it in place. You can then secure your lamps and fan in place. The reason I used the foil is because it encourages the heat up and out towards the eggs, rather than being absorbed into the box, this is also the reason for using silver tape. The lamps and fans can also be secured using heavy duty tape and I also covered the wires with tape as well just for a bit of added security.
|

|
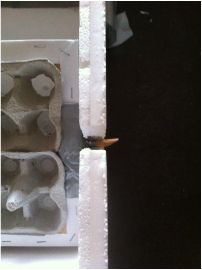
Step #3 - Use this step if you want to make a turner.
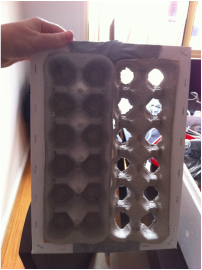
Remove the centre of the canvas leaving only the frame...Or is you aren't lazy like me you can just put together a frame yourself.
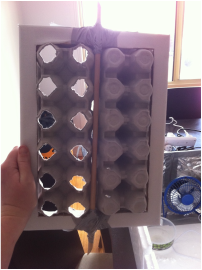
Secure a piece of dowel down the length of the frame and secure the 2 egg cartons (one either side of the dowel). It's always a good idea to cut the bottoms out of you egg cartons before placing the eggs inside as this will allow the heat to circulate each egg more evenly.
Next cut 2 sections from the side walls of the polystyrene box, about 17cm from the opposite end of your lights and fan to put your semi auto turner in. The dowel should stick out both ends, allowing you to rotate the eggs from outside the box.
|
|
|
Step #4
Place a container of water in between the fan and egg turner being careful that the egg turner doesn't touch it when it's turned, this will provide humidity for the eggs. Your humidity will need to be around the 50% mark. You will also want to place 2 small jars of water on either side of you fan as this will help to stabalise the temperature in the incubator. Place your thermometers and hygrometers IN THE MIDDLE of your eggs to give you the most accurate temperature. I like to use 2 thermometers because no thermometer is 100% accurate so whatever the discrepancy is between the 2 thermometers I know that generally the temperature is in between. Please Note: I haven't picture the mercury thermometer at the moment as it is currently in the brooder.
Step #5
Next you will need to puncture ventilation holes into the polystyrene. You should put 4 holes in both ends of the incubator and 4 holes in both walls either side and slightly above your eggs. DO NOT BE WORRIED ABOUT MAKING TOO MANY HOLES! If you make too many holes you can always plug them up with tape, tissues or even cork.
Step #6
So now that this is all set up we just need to plug it all in. One lamp should be plugged directly into the power so that it stays on constantly. The other lamp should be plugged into the reptile thermostat that is then plugged into the wall.
The wire coil on the reptile thermostat should be placed in the middle of your eggs with the thermometers.
What this thermostat will do is, turn the 1 light that is plugged into off when the temperature in the incubator gets too high and then turn that same light back on when the temperature gets too cold. It will take some fiddling to get this right as well. For example for chicken eggs to hatch the eggs must be exposed to an average temperature of 37 degrees celsius...for my incubator to achieve this average my reptile thermostat was set at only 30 degrees celsius. This is because reptile thermostats have a large temperature swing before turning on and off. This being said, my incubator never dropped below 36.9 degrees celsius and kept an average of 37.5 degrees celsius.
It is important to only plug one lamp into the thermostat (you can buy thermostats with 2 plugs but even so...only plug one lamp in) This is to prevent large temperature fluctuations by turning both lights on and off. Turning a light on and off also weakens a light globe and make it more prone to blowing and this is another reason why only one lamp it plugged into the thermostat. If either light globe blows there is still another globe in the incubator working to keep the temperature high enough to prevent death.
Secondly plug your fan into your USB Charger and then into the wall and it should work.
|
|
|
Step #7
Run the incubator for a good week to make sure it is running properly and to iron out any small temperature issues. Once it's been running properly for a week you are ready to set your eggs.
Step #8
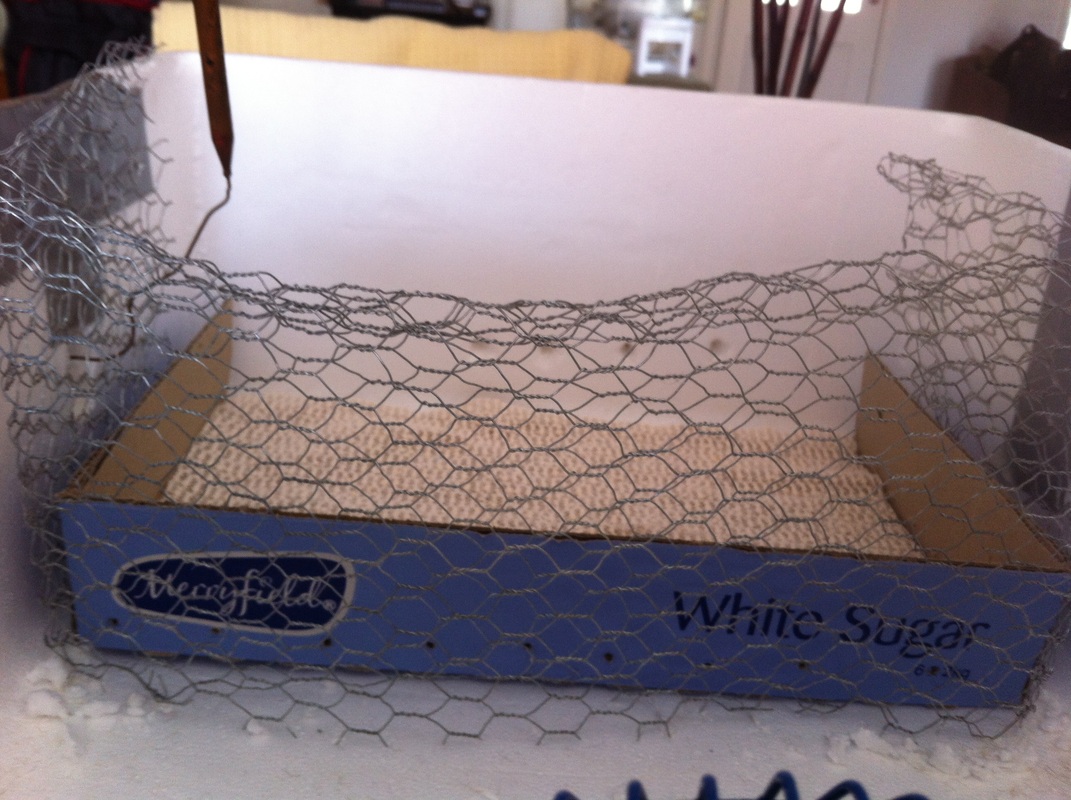
At day 18 replace your semi auto turner with a small container lined with non slip shelf liner or paper towel and surrounded by chicken wire. This will stop you chicks from slipping when they try and walk and will also keep them from wandering into the fan and lights. You will also need to replace you water container with a bigger one to help get your humidity up to 80%.

|
|
Step #9
Make sure you have a video camera handy!
